教程来自b站阿严:https://www.bilibili.com/video/BV1rL4y1W7KH
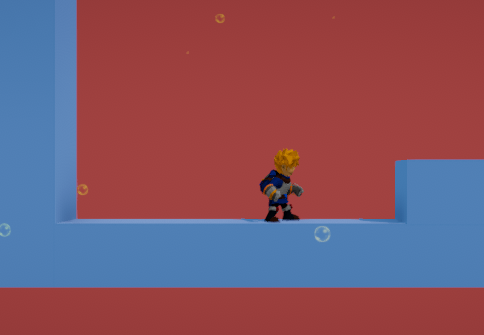
成果展示:
【[unity]平台跳跃类demo】 https://www.bilibili.com/video/BV1AK411Q7ry?share_source=copy_web&vd_source=644eac695af0d52dcffdec474d1423b1
一 项目的创建和管理插件
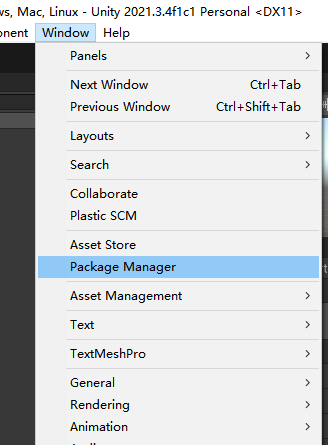
删除不需要的插件,安装需要的插件,删除后插件内容:

1.1 安装:
- Cinemachine,虚拟相机插件。
- Post Processing,后处理插件。
- Input System,新的输入系统插件。
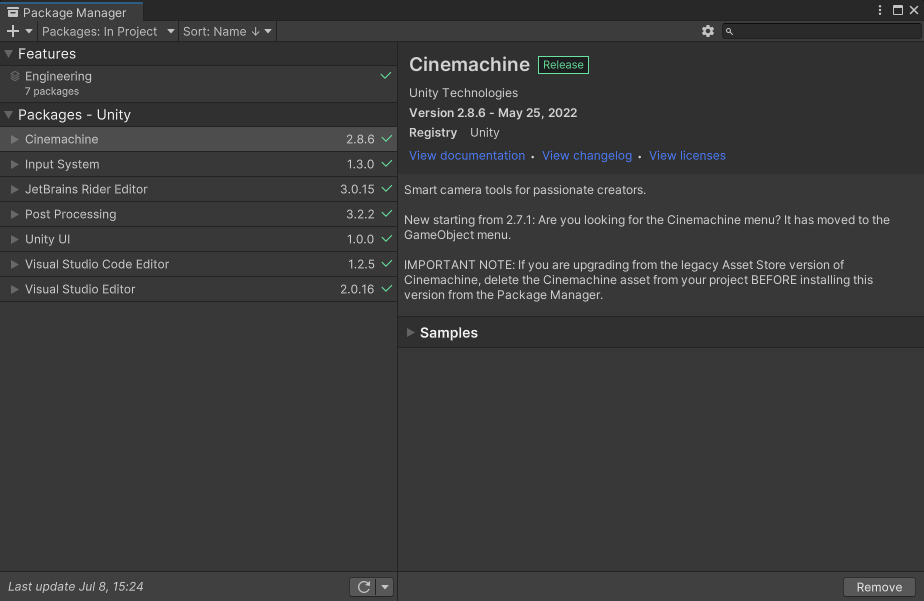
1.2 安装完成后图:
1.3 导入资源包
这里我使用的是自己在unity商店买的资源包,替换了unity酱,想要做点不一样的。
二 状态机系统
创建接口文件和状态机类
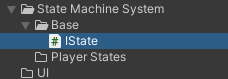
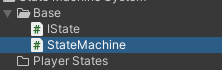
2.1 Istate接口
using System.Collections;
using System.Collections.Generic;
using UnityEngine;
public interface IState
{
void Enter();
void Exit();
void LogicUpdate();
void PhysicUpdate();
}
|
2.2 StateMachine类
作用:
- 持有所有状态,并且进行管理和切换;
- 负责当前状态的更新.
using System.Collections;
using System.Collections.Generic;
using UnityEngine;
public class StateMachine : MonoBehaviour
{
IState currentState;
void Update()
{
currentState.LogicUpdate();
}
void FixedUpdate()
{
currentState.PhysicUpdate();
}
protected void SwitchOn(IState newState)
{
currentState = newState;
currentState.Enter();
}
public void SwitchState(IState newState)
{
currentState.Exit();
SwitchOn(newState);
}
}
|
三 扩展状态机系统
创建PlayerStates(玩家状态)并初始化
using System.Collections;
using System.Collections.Generic;
using UnityEngine;
public class PlayerState : ScriptableObject, IState
{
Animator animator;
PlayerStateMachine stateMachine;
public void Initialize(Animator animator, PlayerStateMachine stateMachine)
{
this.animator = animator;
this.stateMachine = stateMachine;
}
public virtual void Enter()
{
}
public virtual void Exit()
{
}
public virtual void LogicUpdate()
{
}
public virtual void PhysicUpdate()
{
}
}
|
PlayerStatesMachine(玩家状态机)
using System.Collections;
using System.Collections.Generic;
using UnityEngine;
public class PlayerStateMachine : StateMachine
{
Animator animator;
private void Awake()
{
animator = GetComponentInChildren<Animator>();
}
}
|
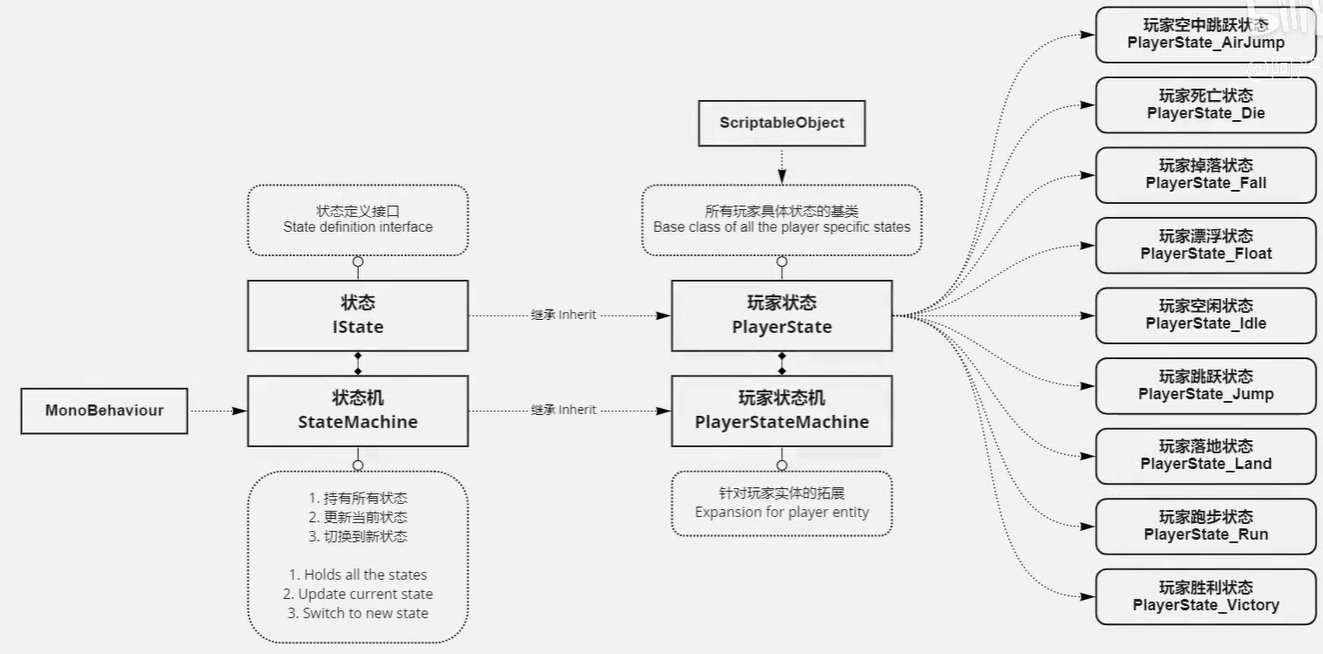
3.1 状态机系统继承关系图
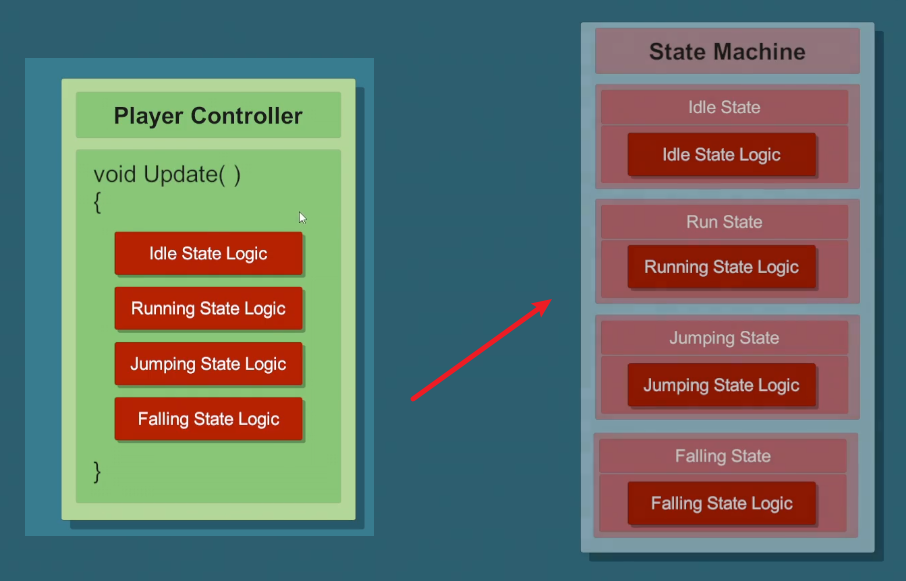
3.2 使用两种方法实现角色动画
3.2.1、常规方法(不使用状态机)
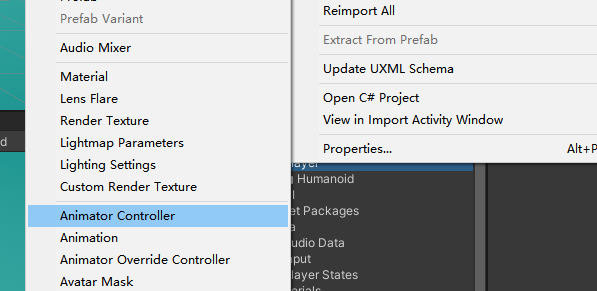
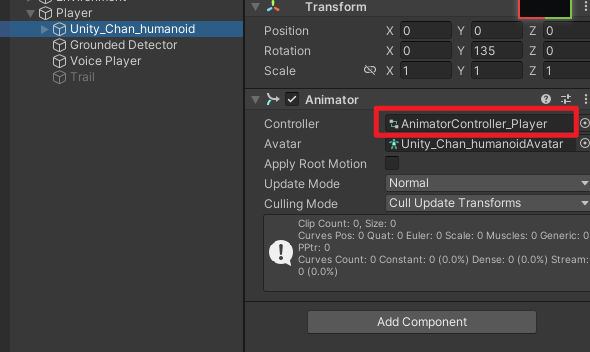
构建基础状态机系统,创建动画控制器
拖到玩家对象
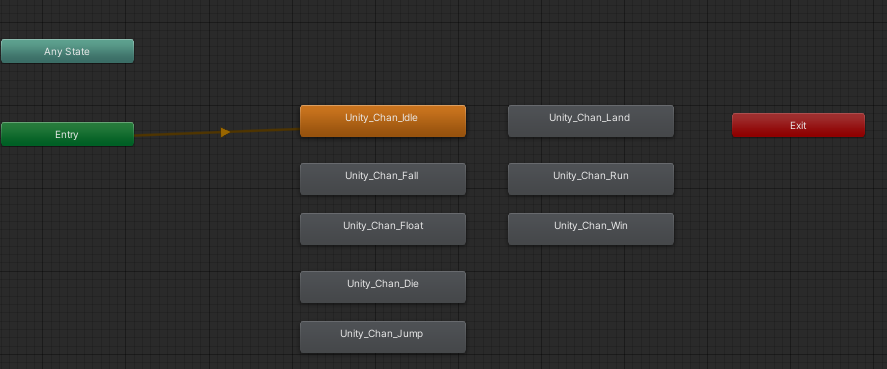
将动画拖入控制器
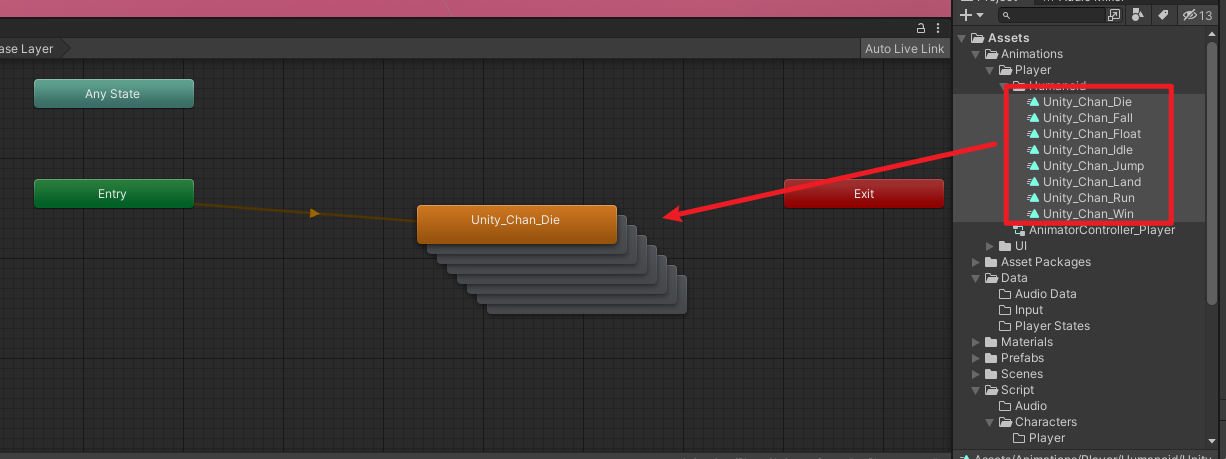
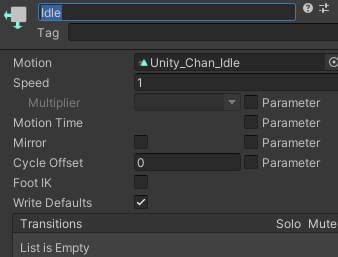
更改默认状态
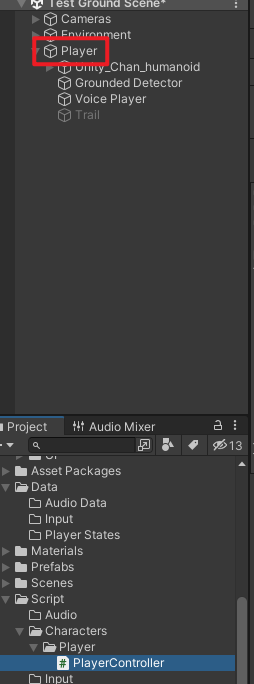
然后在player对象添加玩家控制器脚本
需求分析:
实现方式:
- 获取键盘的输入信号(Input System)
- 播放特定动画(Animator)
PlayerController代码如下:
using System.Collections;
using System.Collections.Generic;
using UnityEngine;
using UnityEngine.InputSystem;
public class PlayerController : MonoBehaviour
{
Animator animator;
private void Awake()
{
animator = GetComponentInChildren<Animator>();
}
void Update()
{
if (Keyboard.current.aKey.isPressed || Keyboard.current.dKey.isPressed)
{
animator.Play("Run");
}
else
{
animator.Play("Idle");
}
}
}
|
并且同时更改动画器中动画的名字,以匹配代码中的命名
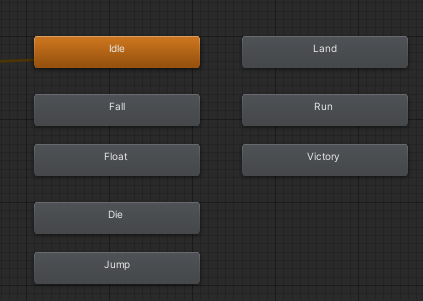
全部改完效果如图:
3.2.2、通过状态机实现动画状态切换
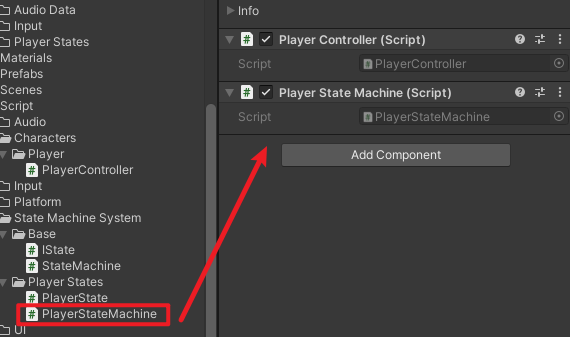
首先将状态机脚本添加到玩家上
其次在Player State文件夹中创建idle和run状态脚本
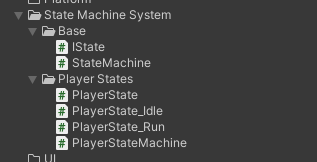
皆继承于PlayerState
[CreateAssetMenu(menuName = "Data/StateMachine/PlayerState/Idle", fileName = "PlayerState_Idle")]
这条代码将代码暴露在编辑器中,可在文件夹中创建可程序化对象文件
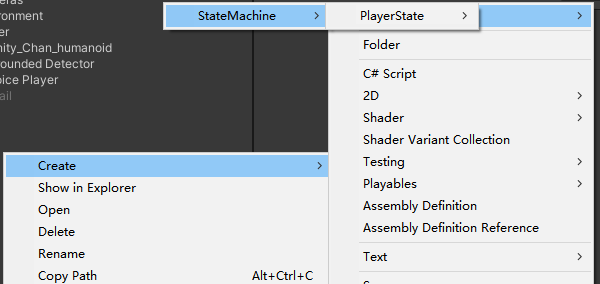

举例PlayerState_Idle代码如下:
重写状态函数,更新状态
using System.Collections;
using System.Collections.Generic;
using UnityEngine;
using UnityEngine.InputSystem;

[CreateAssetMenu(menuName = "Data/StateMachine/PlayerState/Idle", fileName = "PlayerState_Idle")]
public class PlayerState_Idle : PlayerState
{
  public override void Enter()
  {
    animator.Play("Idle");
  }
  public override void LogicUpdate()
  {
    if (Keyboard.current.aKey.isPressed || Keyboard.current.dKey.isPressed)
    {
      stateMachine.SwitchState(stateMachine.runState);
    }
  }
}
|
PlayerState_Idle脚本代码同理。
状态机模式将不同状态分开来处理,这个模式中只需要思考,当前状态如何切换到下一状态,而不再需要同时考虑另一个状态的逻辑问题。
(例如需要落地后才可起跳,常规方法需要使用很多Boolean值来判断状态,而状态机模式只需要在各自状态中实现切换即可)
3.3 状态机模式优缺点
优点
- 逻辑分开到各个状态中处理,不需要考虑状态之间的约束,让思路更清楚。
- 代码性能提升
缺点
3.4 继续完善状态机功能
打开玩家状态机脚本PlayerStateMachine
目前所有新状态都需要新建初始化,是否可以声明一个鸡和然后将所有状态都扔进去呢?当然可以。
首先修改玩家状态机类的代码,(注释中是原代码)
我们新建一个states数组,通过遍历获取玩家具体状态。
using System.Collections;
using System.Collections.Generic;
using UnityEngine;
public class PlayerStateMachine : StateMachine
{
Animator animator;
[SerializeField] PlayerState[] states;
private void Awake()
{
animator = GetComponentInChildren<Animator>();
foreach (PlayerState state in states)
{
state.Initialize(animator, this);
}
}
private void Start()
{
SwitchOn(【idleState】);
}
}
|
这么做idleState会出现报错,
这时需要在父类创建字典,声明一个键为System.Type值为IState类型的字典
然后在玩家状态机类PlayerStateMachine中的状态遍历循环中,给它赋值。
最后就可以通过键来获取状态。以下是父类,也就是状态+6机类StateMachine中代码:
using System.Collections;
using System.Collections.Generic;
using UnityEngine;
public class StateMachine : MonoBehaviour
{
IState currentState;
protected Dictionary<System.Type, IState> stateTbale;
void Update()
{
currentState.LogicUpdate();
}
void FixedUpdate()
{
currentState.PhysicUpdate();
}
protected void SwitchOn(IState newState)
{
currentState = newState;
currentState.Enter();
}
public void SwitchState(IState newState)
{
currentState.Exit();
SwitchOn(newState);
}
}
|
接着在玩家状态机类awake()中初始化,更改后的玩家状态机类代码如下:
using System.Collections;
using System.Collections.Generic;
using UnityEngine;
public class PlayerStateMachine : StateMachine
{
Animator animator;
[SerializeField] PlayerState[] states;
private void Awake()
{
animator = GetComponentInChildren<Animator>();
stateTbale = new Dictionary<System.Type, IState>(states.Length);
foreach (PlayerState state in states)
{
state.Initialize(animator, this);
stateTbale.Add(state.GetType(), state);
}
}
private void Start()
{
Debug.Log(typeof(PlayerState_Idle));
SwitchOn(stateTbale[typeof(PlayerState_Idle)]);
}
}
|
接着会遇到两个报错:PlayerState_Run和PlayerState_Idle类中的状态切换里的变量不存在了。
我们需要回到状态机主类StateMachine,重载状态切换函数SwitchState。将变量类型改为字典需要的键(System.Type类)对比如下:
public void SwitchState(IState newState)
{
currentState.Exit();
SwitchOn(newState);
}
public void SwitchState(System.Type newStateType)
{
SwitchState(stateTbale[newStateType]);
}
|
这样在报错的PlayerState_Run和PlayerState_Idle中修改相应的变量即可:
stateMachine.SwitchState(runState);
改成了
stateMachine.SwitchState(typeof(PlayerState_Run));
using System.Collections;
using System.Collections.Generic;
using UnityEngine;
using UnityEngine.InputSystem;

[CreateAssetMenu(menuName = "Data/StateMachine/PlayerState/Idle", fileName = "PlayerState_Idle")]
public class PlayerState_Idle : PlayerState
{
  public override void Enter()
  {
    animator.Play("Idle");
  }
  public override void LogicUpdate()
  {
    if (Keyboard.current.aKey.isPressed || Keyboard.current.dKey.isPressed)
    {
      stateMachine.SwitchState(typeof(PlayerState_Run));
    }
  }
}
|
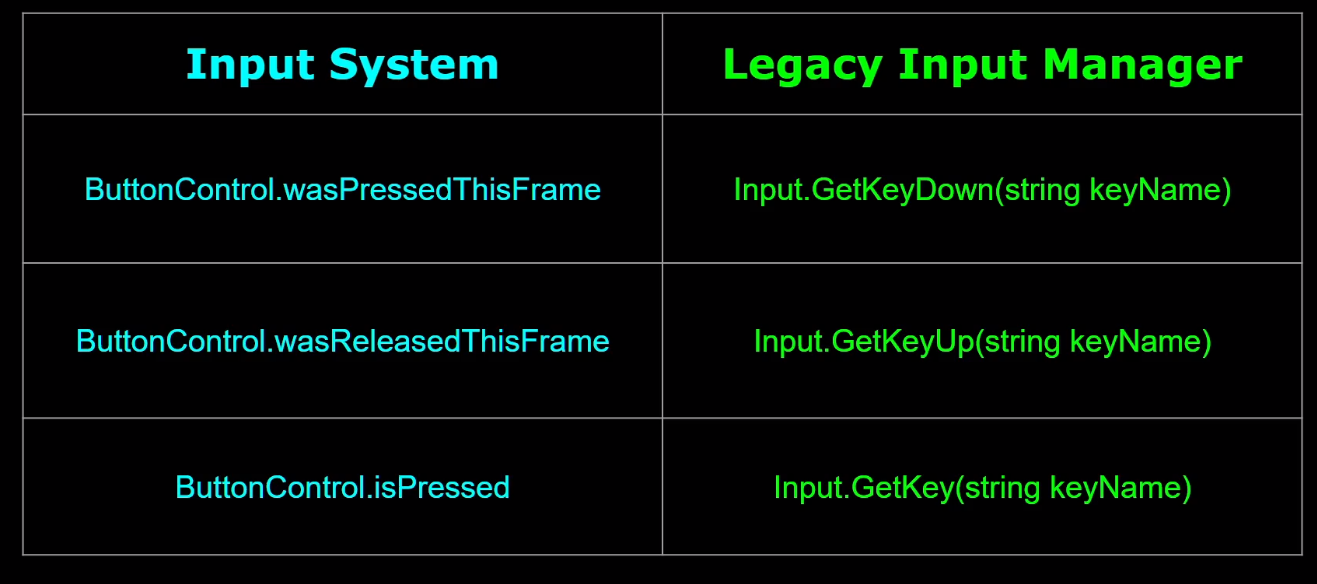
如果需要某个功能对应不同按键都可触发,使用InputSystem会更加方便。不使用输入系统的话需要多个判断语句实现。
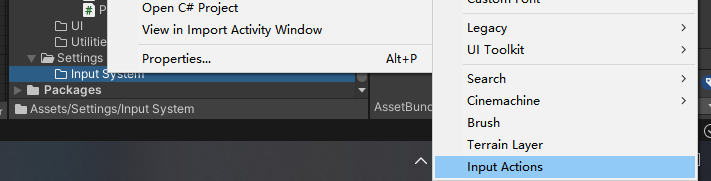
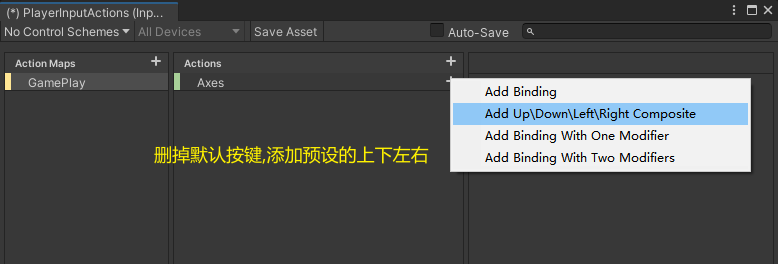
命名为PlayerInputActions,玩家输入动作
4.1.1、创建移动动作
新建GamePlay动作表,重命名动作名为Axes 轴。右边动作类型选value,值类型选二维向量
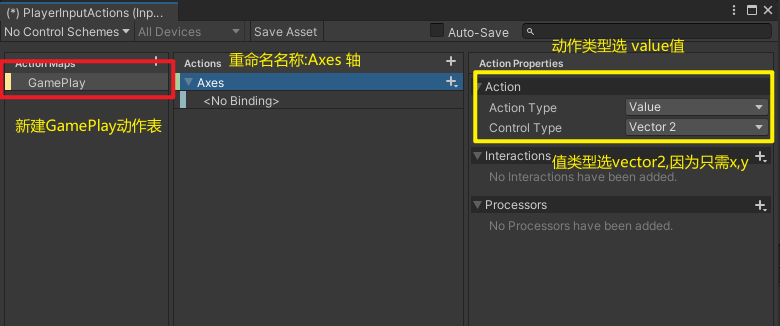
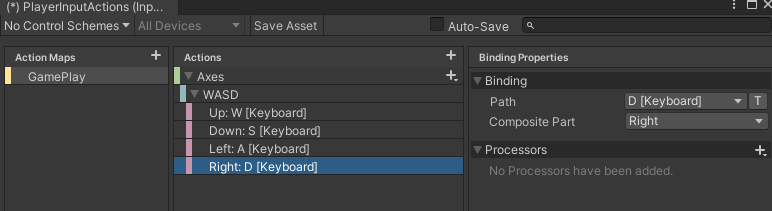
删除默认的按键,添加预设的上下左右
通过listen绑定按键
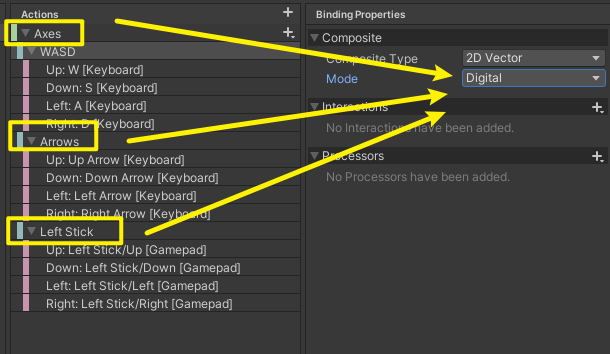
手柄和键盘的模式都改成digital,这样手柄将和键盘一样xy取值只有0,-1,1
4.1.2、创建跳跃动作
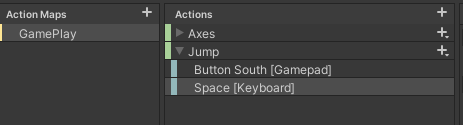
记得保存资产
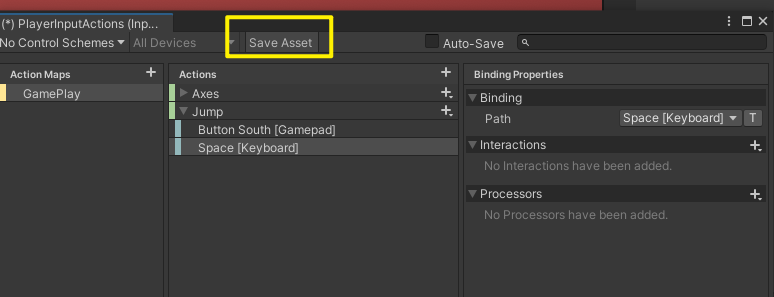
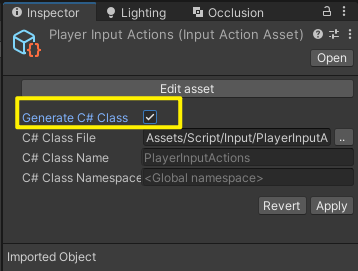
4.1.3、生成c#文件
更改文件位置
4.2 初始化玩家输入
using UnityEngine;
public class PlayerInput : MonoBehaviour
{
PlayerInputActions playerInputAction;
public bool PlayerMove => AxisX != 0f;
Vector2 axes => playerInputAction.GamePlay.Axes.ReadValue<Vector2>();
public float AxisX => axes.x;
public bool playerjump => playerInputAction.GamePlay.Jump.WasPressedThisFrame();
public bool playerstopJump => playerInputAction.GamePlay.Jump.WasReleasedThisFrame();
private void Awake()
{
playerInputAction = new PlayerInputActions();
}
public void EnableGameplayInputs()
{
playerInputAction.GamePlay.Enable();
Cursor.lockState = CursorLockMode.Locked;
}
}
|
4.2.2、更改PlayerState 玩家状态脚本,加入玩家输入 初始化
using System.Collections;
using System.Collections.Generic;
using UnityEngine;
public class PlayerState : ScriptableObject, IState
{
protected Animator animator;
protected PlayerInput input;
protected PlayerStateMachine stateMachine;
public void Initialize(Animator animator, PlayerInput input, PlayerStateMachine stateMachine)
{
this.animator = animator;
this.input = input;
this.stateMachine = stateMachine;
}
public virtual void Enter()
{
}
public virtual void Exit()
{
}
public virtual void LogicUpdate()
{
}
public virtual void PhysicUpdate()
{
}
}
|
4.2.3、修改PlayerState_Idle和PlayerState_Run脚本
因为在PlayerInput中,新建了一个变量表示玩家是否移动。原来判断玩家是否在移动的语句优化如下:
旧版通过检测按键a或者d判断:
if (Keyboard.current.aKey.isPressed || Keyboard.current.dKey.isPressed)
新版判断输入事件x轴是否为0,得出玩家是否正移动:
if (input.PlayerMove)
4.2.4、在PlayerStateMachine 玩家状态机类中初始化玩家输入
部分代码如下:
PlayerInput input;
private void Awake()
{
animator = GetComponentInChildren<Animator>();
input = GetComponent<PlayerInput>();
stateTbale = new Dictionary<System.Type, IState>(states.Length);
foreach (PlayerState state in states)
{
state.Initialize(animator, input, this);
stateTbale.Add(state.GetType(), state);
}
}
|
4.2.5、在PlayerController 玩家控制器类中添加玩家输入,并且启用动作表
public class PlayerController : MonoBehaviour
{
PlayerInput input;
private void Awake()
{
input = GetComponent<PlayerInput>();
}
private void Start()
{
input.EnableGameplayInputs();
}
#region 常规方法(不使用状态机)...
}
|
五 玩家移动、转向
5.1 玩家移动功能实现
分析:通过刚体模拟物体运动,需要获取player身上的刚体组件。
将玩家移动功能写在PlayerController玩家控制器脚本中。
新建刚体变量,获取实例,创建了三个改变刚体速度的函数
using System.Collections;
using System.Collections.Generic;
using UnityEngine;
using UnityEngine.InputSystem;
public class PlayerController : MonoBehaviour
{
PlayerInput input;
Rigidbody rigidBody;
private void Awake()
{
input = GetComponent<PlayerInput>();
rigidBody = GetComponent<Rigidbody>();
}
private void Start()
{
input.EnableGameplayInputs();
}
public void SetVelocity(Vector3 velocity)
{
rigidBody.velocity = velocity;
}
public void SetVelocityX(float velocityX)
{
rigidBody.velocity = new Vector3(velocityX, rigidBody.velocity.y);
}
public void SetVelocityY(float velocityY)
{
rigidBody.velocity = new Vector3(rigidBody.velocity.x, velocityY);
}
#region 常规方法(不使用状态机)...
}
|
PlayerState 玩家状态类中添加玩家控制器类,并初始化(部分代码)
protected PlayerController player;
public void Initialize(PlayerController player, Animator animator, PlayerInput input, PlayerStateMachine stateMachine)
{
this.player = player;
this.animator = animator;
this.input = input;
this.stateMachine = stateMachine;
}
|
PlayerStateMachine 玩家状态机类一起更新
using System.Collections;
using System.Collections.Generic;
using UnityEngine;
public class PlayerStateMachine : StateMachine
{
Animator animator;
PlayerInput input;
PlayerController playerController;
[SerializeField] PlayerState[] states;
private void Awake()
{
animator = GetComponentInChildren<Animator>();
input = GetComponent<PlayerInput>();
playerController = GetComponent<PlayerController>();
stateTbale = new Dictionary<System.Type, IState>(states.Length);
foreach (PlayerState state in states)
{
state.Initialize(playerController, animator, input, this);
stateTbale.Add(state.GetType(), state);
}
}
private void Start()
{
SwitchOn(stateTbale[typeof(PlayerState_Idle)]);
}
}
|
在PlayerState_Run 跑步状态脚本中**重写PhysicUpdate()**方法实现玩家移动
using System.Collections;
using System.Collections.Generic;
using UnityEngine;
[CreateAssetMenu(menuName = "Data/StateMachine/PlayerState/Run", fileName = "PlayerState_Run")]
public class PlayerState_Run : PlayerState
{
[SerializeField] float runSpeed = 5f;
public override void Enter()
{
animator.Play("Run");
}
public override void LogicUpdate()
{
if (!input.PlayerMove)
{
stateMachine.SwitchState(typeof(PlayerState_Idle));
}
}
public override void PhysicUpdate()
{
player.SetVelocityX(runSpeed);
}
}
|
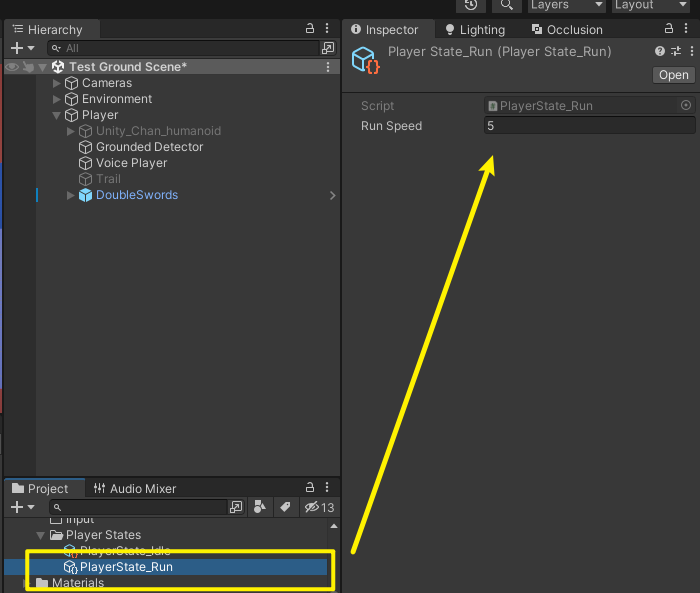
新建变量runSpeed 跑步速度 将它序列化,已暴露在编辑器中,至此移动功能实现。
5.2 玩家转向
5.2.1、通过镜像翻转改变玩家朝向
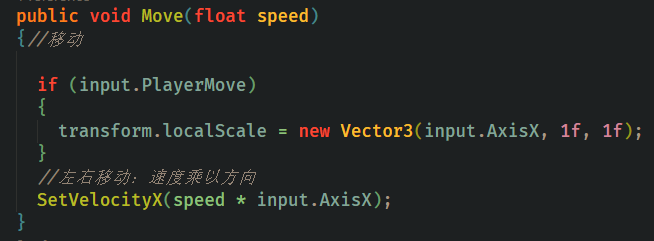
首先在PlayerController 玩家控制器中增加Move(),
通过更改Player的localScale的属性x轴正负(对应axisX轴)值,同步修改角色朝向。
左右移动功能使用速度x方向
然后修改PlayerState_Run中**PhysicUpdate()**函数
player.SetVelocityX(runSpeed);改为player.Move(runSpeed);
新的比旧的多了转向功能。
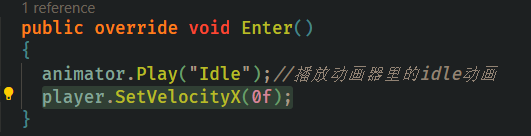
5.5.2、停止移动
**PlayerState_Idle类Enter()**中新加一条代码player.SetVelocityX(0f);x轴速度归零
5.3 玩家加速和减速
5.3.1、实现玩家加速
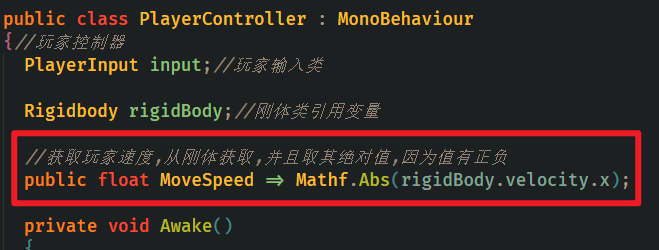
在玩家控制器中添加一个方法,获取玩家移速。
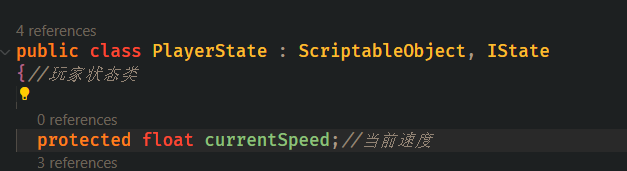
打开玩家状态类声明浮点型变量currentSpeed,当前速度
修改PlayerState_Run脚本,新增变量acceration加速度,Enter()中获取当前速度,LogicUpdate()中新增缓慢加速的算法。
using System.Collections;
using System.Collections.Generic;
using UnityEngine;
[CreateAssetMenu(menuName = "Data/StateMachine/PlayerState/Run", fileName = "PlayerState_Run")]
public class PlayerState_Run : PlayerState
{
[SerializeField] float runSpeed = 5f;
[SerializeField] float acceration = 10f;
public override void Enter()
{
animator.Play("Run");
currentSpeed = player.MoveSpeed;
}
public override void LogicUpdate()
{
if (!input.PlayerMove)
{
stateMachine.SwitchState(typeof(PlayerState_Idle));
}
currentSpeed = Mathf.MoveTowards(currentSpeed, runSpeed, acceration * Time.deltaTime);
}
public override void PhysicUpdate()
{
player.Move(currentSpeed);
}
}
|
5.3.2、实现玩家减速
修改PlayerState_Idle脚本,新增变量deceleration表示减速加速度,Enter()中记录当前速度,LogicUpdate()中新增缓慢减速算法。重写PhysicUpdate()方法设置减速。
using System.Collections;
using System.Collections.Generic;
using UnityEngine;
[CreateAssetMenu(menuName = "Data/StateMachine/PlayerState/Idle", fileName = "PlayerState_Idle")]
public class PlayerState_Idle : PlayerState
{
[SerializeField] float deceleration = 5f;
public override void Enter()
{
animator.Play("Idle");
currentSpeed = player.MoveSpeed;
}
public override void LogicUpdate()
{
if (input.PlayerMove)
{
stateMachine.SwitchState(typeof(PlayerState_Run));
}
currentSpeed = Mathf.MoveTowards(currentSpeed, 0, deceleration * Time.deltaTime);
}
public override void PhysicUpdate()
{
player.SetVelocityX(currentSpeed * player.transform.localScale.x);
}
}
|
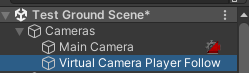
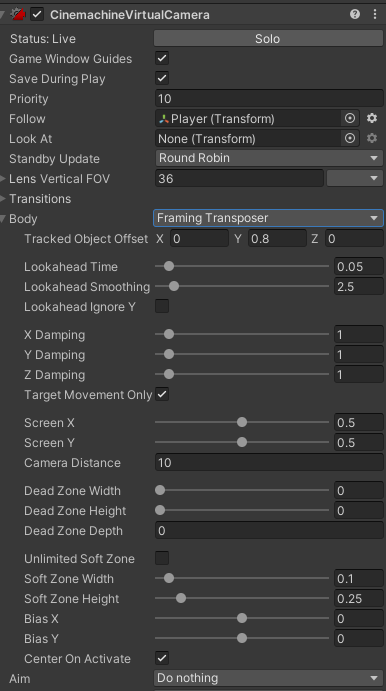
5.4 相机跟随玩家
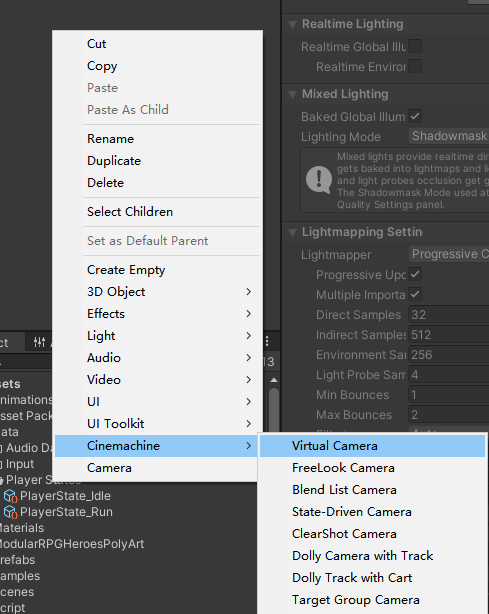
使用Cinemachine虚拟相机插件实现。
新建虚拟相机命名为Virtual Camera Player Follow,
拖到Cameras下。
提前重置两个相机位置,然后将player拖到follow槽中
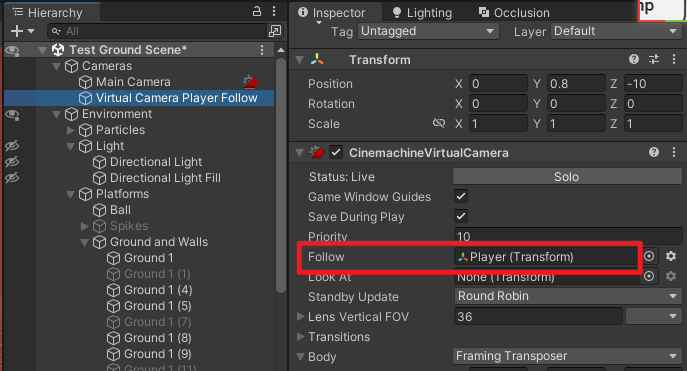
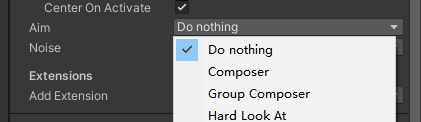
取消勾选Aim选项,这个是用作瞄准用的。
将body机身改成Framing Transposer取景器
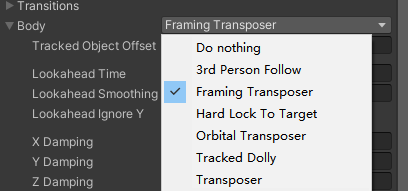
调试参数,选中这个,在试玩时做的操作也会保存

六 优化改进动画播放
PlayerState玩家状态脚本中新增三条属性
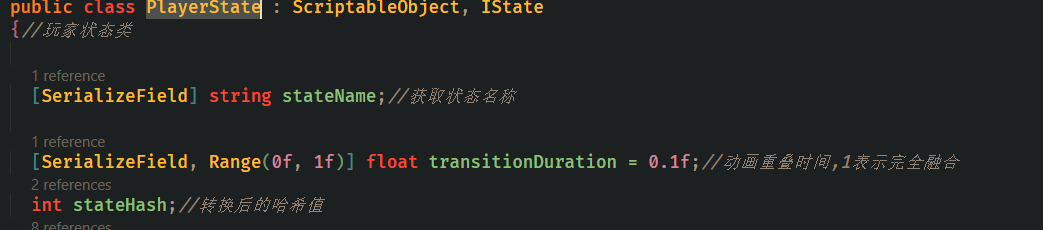
分别用来获取状态动画名称、动画切换时间、声明int类型哈希值。
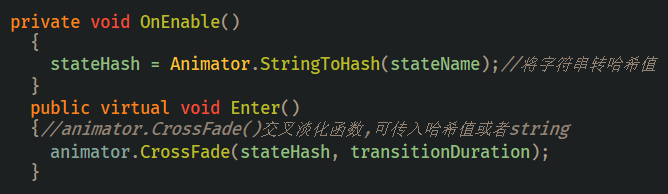
onenable()中,将获取的字符串转哈希值(哈希值占用资源少)。
Enter()中,使用animator.crossFade()过渡动画,淡入淡出效果。
参数1:字符串或者哈希值,参数2:持续时间。
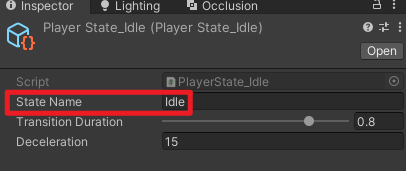
玩家状态PlayerState_Idle和PlayerState_Run中的animator.Play()改为base.Enter();继承父类
回到编辑器中只需要在可视化脚本中输入动画名即可.
七 玩家跳跃功能
7.1 地面检测
要实现跳跃功能,首先要检测地面。
在Player对象下的Ground Detector空对象中添加新的脚本:PlayerGroundDetector 玩家地面检测器
代码如下:
using System.Diagnostics;
using System.Collections;
using System.Collections.Generic;
using UnityEngine;
public class PlayerGroundDetector : MonoBehaviour
{
[SerializeField] float detectionRadius = 0.1f;
[SerializeField] LayerMask groundLayer;
Collider[] colliders = new Collider[1];
public bool IsGrounded => Physics.OverlapSphereNonAlloc(transform.position, detectionRadius, colliders,groundLayer) != 0;
void OnDrawGizmosSelected()
{
Gizmos.color = Color.green;
Gizmos.DrawWireSphere(transform.position, detectionRadius);
}
}
|
在PlayerController 玩家控制器脚本中新增代码,以使用玩家地面检测器的参数.
新增内容:
PlayerGroundDetector groundDetector;
public bool IsGrounded => groundDetector.IsGrounded;
public bool IsFalling => rigidBody.velocity.y < 0f && !IsGrounded;
|
7.2 检测当前播放动画是否完成
需要获取:1.动画播放开启的时间;2.当前状态持续时长;3.动画自身播放时长
打开玩家状态脚本 PlayerState,新增代码.
float stateStartTime;
protected bool IsAnimationFinished => StateDuration >= animator.GetCurrentAnimatorStateInfo(0).length;
protected float StateDuration => Time.time - stateStartTime;
|
Enter()中给stateStartTime赋值
public virtual void Enter()
{
animator.CrossFade(stateHash, transitionDuration);
stateStartTime = Time.time;
}
|
7.3 玩家跳跃
新建三个状态类PlayerState_Fall,PlayerState_JumpUp,PlayerState_Land。
玩家按下跳跃键,并且玩家在地面上